


A common paradigm in web development is the deployment of a static website to Amazon S3 instead of hosting in a web server. Web applications relying on server-side rendering frameworks like ASP.NET, Spring, and Ruby on rails to name a few, are NOT candidates for deployment to S3. But even with these server-side rendering-based web applications, static content can still be stored in S3 to leverage CDN capabilities provided by AWS Cloudfront. Authentication is not available "out of the box" for S3-based web applications.
In this post, I will cover how AWS Cloudfront, Lambda@Edge, and Cognito can be used to implement authentication for a static React website published onto S3. We will cover authentication via Cognito.
To follow the steps in this article and implement the authorization you will need to use your AWS account or create a test account. Please do NOT use your work AWS account. See AWS Free Tier to create free tier account.
You will also need to sign up for a Core Weather free account on developer.accuweather.com since the my-weather React website uses the AccuWeather API.
Clone and test the static React site locally
The demo application for this post is a React application that fetches the next 12 hours' weather for the user's location. It leverages the browser's geolocation capability and uses AccuWeather's API to fetch the weather. Clone the code for this from Github.
Update <location of the React app files>\src\config.json>->accuweatherappkey with the app key from your AccuWeather account.
In the command prompt:
- cd <location of the React app files>
- npm start
Open http://localhost:3000 to view it in your browser.
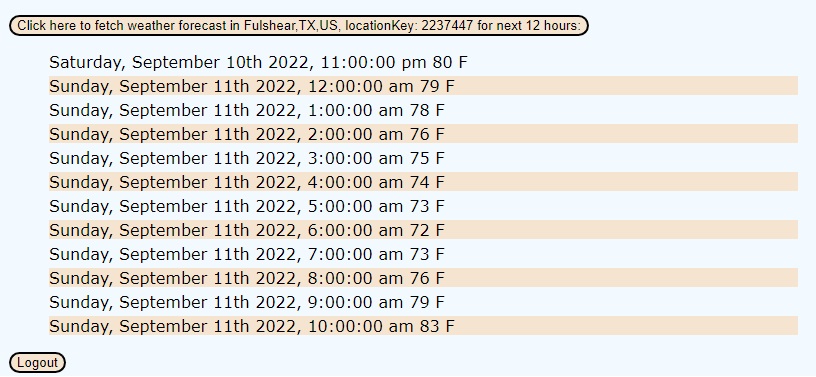
Once the app comes up, wait a few seconds for the location to show up in the "Click here…" button. Once it does, click on the button and wait for a few seconds for the next 12 hours' temperatures to get populated. You should see a screen like this:
 3. 'npm run build' - to build the app for production to the
 build folder.
4. The contents of the 'build' folder will need to be copied to the s3 location belonging to the web application as described in the Replace s3 location with the React app files section below.
Deploy and test the sample application for cookies-based authentication
The inspiration and main reference for this blog post is the Amazon article: Authorization@Edge using cookies: Protect your Amazon CloudFront content from being downloaded by unauthenticated users. It will be easier to review the Amazon article in its entirety after you complete the steps in this current post. From the "Deploying the Sample solution" section in the Amazon article, launch AWS Serverless Application Repository. Keep the defaults in the Application Settings page that comes up except HttpHeaders. You set HttpHeaders to:
{"Content-Security-Policy": "default-src 'none'; img-src 'self'; script-src 'self' https://code.jquery.com https://stackpath.bootstrapcdn.com; style-src 'self' 'unsafe-inline' https://stackpath.bootstrapcdn.com; object-src 'none'; connect-src 'self' https://*.amazonaws.com https://*.amazoncognito.com https://intense-hollows-72278.herokuapp.com https://dataservice.accuweather.com",
"Strict-Transport-Security": "max-age=31536000; includeSubdomains; preload",
"Referrer-Policy": "same-origin",
"X-XSS-Protection": "1; mode=block",
"X-Frame-Options": "DENY",
"X-Content-Type-Options": "nosniff"}
These URLs in the value for "Content-Security-Policy" above:
are the ones needed by the my-weather website to make the API calls to fetch the weather information without Cross-Origin Resource Sharing (CORS) errors.
In the Application Settings page that comes up when launching AWS Serverless Application Repository, check on:
- I acknowledge that this app creates custom IAM roles and resource policies.
Click the Deploy button.
Now, check AWS Console-> CloudFormation ->Stacks and make sure the serverlessrepo-cloudfront-authorization-at-edge comes up with status=CREATE_COMPLETE like this:

If you see errors in the stack created under CloudFormation, it is most likely because of incomplete cleanup after previous attempts at running AWS Serverless Application Repository. In AWS Console, disable the last distribution created in Cloudfront->Distribution. Once the status shows Disabled, delete the distribution. Delete CloudFormation->Stacks->serverlessrepo-cloudfront-authorization-at-edge. Wait for the stack with DELETE_IN_PROGRESS status to disappear in CloudFormation->Stacks. If the deletion of the CloudFormation stack results in errors, you will need to delete all of the Lambdas created by the Cloudformation stack creation attempt and then reattempt the deletion of the CloudFormation stack. s3 Next, clean up any buckets you do not recognize in S3. After that reattempt creating the stack following the steps above.
Once the deployment is complete, in your AWS console window, search for Cognito and then click on Manage User Pools. You should see a user pool created with the name serverlessrepo-cloudfront-authorization-at-edge. There will be no users created if you followed the defaults in AWS Serverless Application Repository. In the user pool, create a user as described in Signing up and confirming user accounts - Amazon Cognito. You only need to follow the steps from Verifying contact information section. Other information like Callback URL(s) and Sign out URL(s) will have been created already by the cloud formation that you completed earlier.
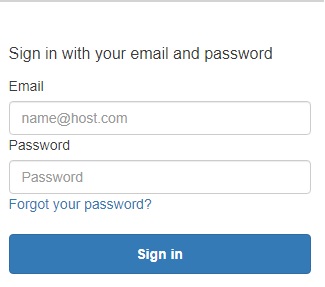
Now, in your AWS Console window in the browser, go to CloudFront and invoke the distribution that was just created. Copy the Distribution domain name and paste it into a browser tab. You will see a Cognito login prompt:
Login and you will see the landing page. Click on the Signout link on the page and you will need to log in again. You have now, tested the sample application. In this blog post, you have seen a demonstration of serverless in action. The magic behind the authentication flow is implemented by AWS Lambda@Edge. Review The sample solution, step by step section in Authorization@Edge using cookies: Protect your Amazon CloudFront content from being downloaded by unauthenticated users to understand how the different Lambda@Edge functions for each of the authentication flow steps are implemented.
Replace the s3 location with the React app files
In your AWS Console browser window, go to the S3 location as shown in the CloudFront > Distributions > <Id of the just created distribution> > Origins tab > protected-origin. Upload to this S3 location, the React files from <location of the React app files>/build and the static subfolder as well.
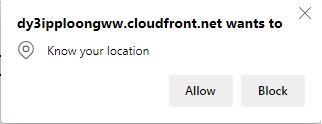
Retest the Cloudfront distribution by refreshing the browser tab with the URL you had pasted to test the sample application. You will now be prompted to log in and after you log in, you will see the my-weather website. Click on Allow when this you see this pop-up:
You can click on the Logout button to be redirected to the login prompt.
Extra points
Now that you have successfully implemented a static React website on S3 with Cognito authentication and cookies-based authorization using Lambda@Edge, you can try implementing social sign-in with your favorite identity provider: Facebook, Google, Amazon, or Apple following the steps described in Adding social identity providers to a user pool - Amazon Cognito.
Hope this post was useful to you. You can leave your comments in the Enter comments here.. box at end of this page and hit Submit Reply.